用pdb调试OpenStack

点击打开链接

  1. 创建文件creds:

exportSERVICE_TOKEN=xxx(3中输入的密码)
exportOS_TENANT_NAME=admin
exportOS_USERNAME=admin
export OS_PASSWORD=xxx
exportOS_AUTH_URL=http://localhost:5000/v2.0/
exportSERVICE_ENDPOINT=http://localhost:35357/v2.0
source creds就可以使用openstack了

  1. 若想更改已安装的组件,再./stack.sh即可

Pdb调试Havana过程

  1. 修改代码
    在需要调试的地方加入:
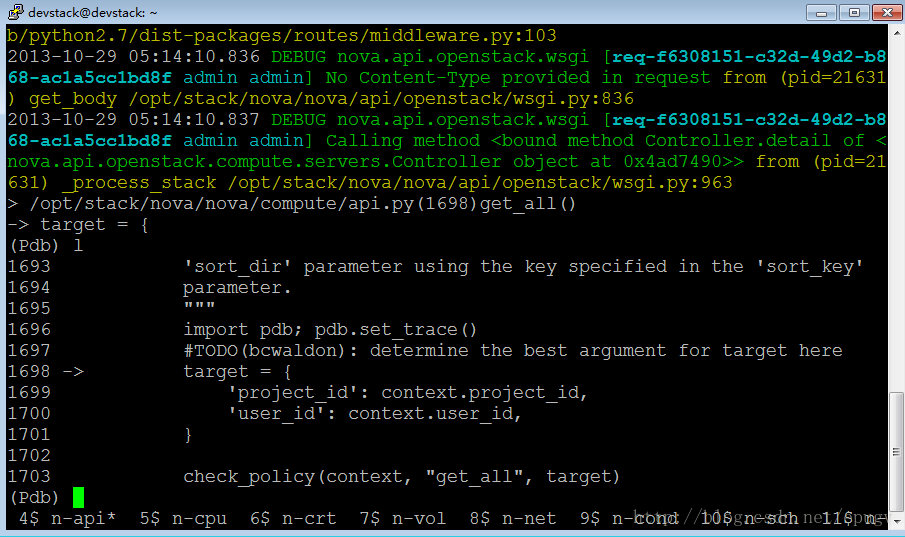
    import pdb; pdb.set_trace()(以在nova/compute/api.py:get_all()中加入pdb为例)
  2. 重启服务
    在相应的screen中用ctrl+c终止当前进程,然后按向上的方向键,就会出现启动服务的命令,按enter服务就起来了。
  3. 开始调试:

显示有两个screen
screen –x stack
进入如下界面:
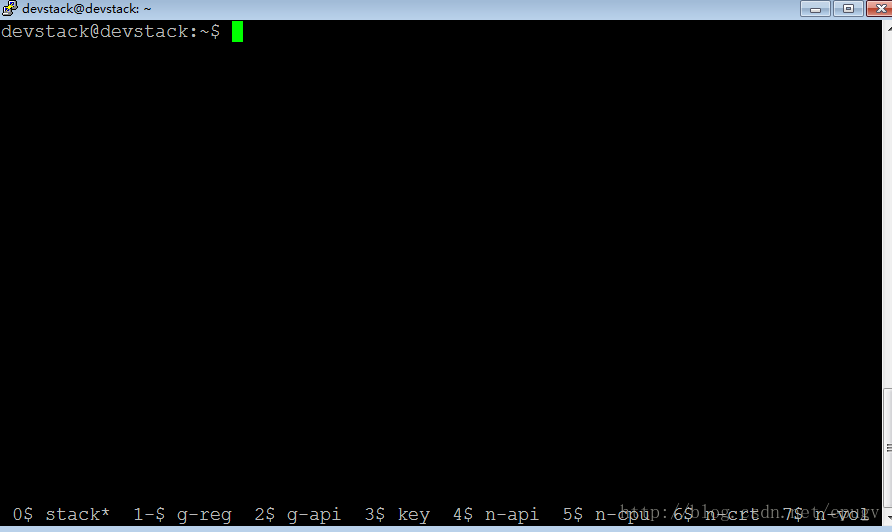
最下一行表示,每一个进程都有一个screen。带*号的表示当前的screen,可以同时按下ctrl+a+8和ctrl+a+2分别前进和后退,来切换不同的screen.

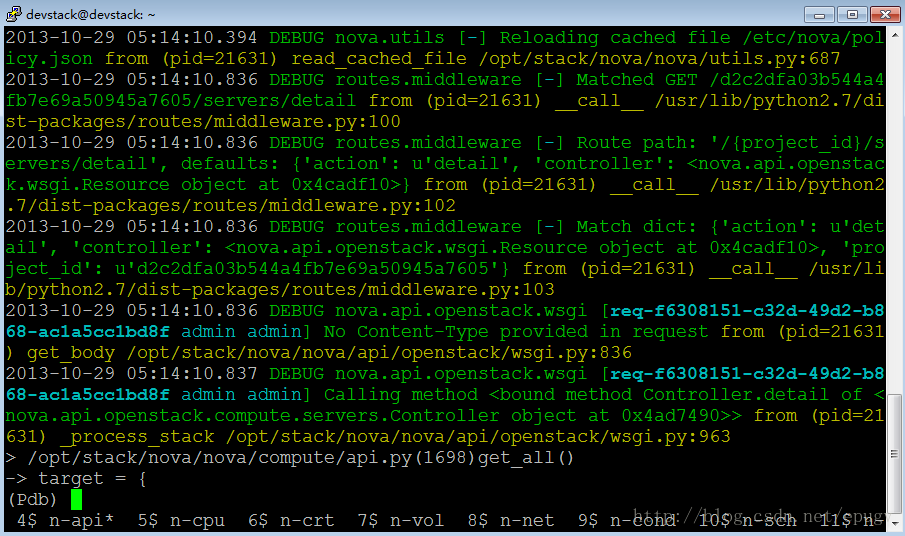
  1. 在0$中输入nova list;切换到4$ n-api:

  2. 开始使用pdb进行调试

  3. 物理机重启后,可使用rejoin-stack.sh启动openstack服务

  4. ctrl+a+shift+”, 可以选择screen , 主要就不需要通过ctrl + a or ctrl + p 来回切换了:)。

参考资料

  1. 使用pdb调试openstack (How to debug openstackusing pdb )
  2. linux screen 命令详解
1
2
3
4
5
6
7
8
9
10
11
12
13
14
15
16
17
18
19
20
21
22
23
24
25
26
27
28
29
30
31
32
33
34
35
36
37
38
39
40
41
42
43
44
45
46
47
48
49
50
51
52
53
54
55
56
57
58
59
60
61
62
63
64
65
66
67
68
69
70
71
72
73
74
75
76
77
78
79
80
81
82
83
84
85
86
87
88
89
90
91
92
93
94
95
96
97
98
99
100
101
102
103
104
105
106
107
108
ADMIN_PASSWORD=password
MYSQL_PASSWORD=stackdb
RABBIT_PASSWORD=stackqueue
SERVICE_PASSWORD=$ADMIN_PASSWORD
#enable_service rally
SERVICE_TOKEN=password
## vnc
#enable_service n-spice
#enable_service n-novnc
#enable_service n-xvnc
#GIT_BASE=https://code.csdn.net
# Reclone each time
#RECLONE=yes
RECLONE=no
## For Keystone
KEYSTONE_TOKEN_FORMAT=PKI
## For Swift
#SWIFT_REPLICAS=1
#SWIFT_HASH=011688b44136573e209e
# Enable Logging
LOGFILE=/opt/stack/logs/stack.sh.log
VERBOSE=True
LOG_COLOR=True
SCREEN_LOGDIR=/opt/stack/logs
# Pre-requisite
ENABLED_SERVICES=rabbit,mysql,key
## If you want ZeroMQ instead of RabbitMQ (don't forget to un-declare 'rabbit' from the pre-requesite)
#ENABLED_SERVICES+=,-rabbit,-qpid,zeromq
## If you want Qpid instead of RabbitMQ (don't forget to un-declare 'rabbit' from the pre-requesite)
#ENABLED_SERVICES+=,-rabbit,-zeromq,qpid
# Horizon (Dashboard UI) - (always use the trunk)
ENABLED_SERVICES+=,horizon
HORIZON_REPO=https://github.com/openstack/horizon
HORIZON_BRANCH=master
# Nova - Compute Service
ENABLED_SERVICES+=,n-api,n-crt,n-obj,n-cpu,n-cond,n-sch
######vnc
ENABLED_SERVICES+=,n-novnc,n-xvnc
#jjIMAGE_URLS+=",https://launchpad.net/cirros/trunk/0.3.0/+download/cirros-0.3.0-x86_64-disk.img"
#IMAGE_URLS+=",http://172.28.0.1/image/cirros-0.3.0-x86_64-disk.img"
# Nova Network - If you don't want to use Neutron and need a simple network setup (old good stuff!)
#ENABLED_SERVICES+=,n-net
## Nova Cells
#ENABLED_SERVICES+=,n-cell
# Glance - Image Service
ENABLED_SERVICES+=,g-api,g-reg
# Swift - Object Storage
#ENABLED_SERVICES+=,s-proxy,s-object,s-container,s-account
# Neutron - Networking Service
# If Neutron is not declared the old good nova-network will be used
ENABLED_SERVICES+=,q-svc,q-agt,q-dhcp,q-l3,q-meta,neutron
## Neutron - Load Balancing
ENABLED_SERVICES+=,q-lbaas
## Neutron - VPN as a Service
ENABLED_SERVICES+=,q-vpn
## Neutron - Firewall as a Service
ENABLED_SERVICES+=,q-fwaas
# VLAN configuration
#Q_PLUGIN=ml2
#ENABLE_TENANT_VLANS=True
# GRE tunnel configuration
Q_PLUGIN=ml2
ENABLE_TENANT_TUNNELS=True
# VXLAN tunnel configuration
#Q_PLUGIN=ml2
#Q_ML2_TENANT_NETWORK_TYPE=vxlan
# Cinder - Block Device Service
VOLUME_GROUP="cinder-volumes"
ENABLED_SERVICES+=,cinder,c-api,c-vol,c-sch,c-bak
# Heat - Orchestration Service
ENABLED_SERVICES+=,heat,h-api,h-api-cfn,h-api-cw,h-eng
#IMAGE_URLS+=",http://fedorapeople.org/groups/heat/prebuilt-jeos-images/F17-x86_64-cfntools.qcow2"
# Ceilometer - Metering Service (metering + alarming)
#ENABLED_SERVICES+=,ceilometer-acompute,ceilometer-acentral,ceilometer-collector,ceilometer-api
#ENABLED_SERVICES+=,ceilometer-alarm-notify,ceilometer-alarm-eval
# Apache fronted for WSGI
#APACHE_ENABLED_SERVICES+=keystone,swift
APACHE_ENABLED_SERVICES+=keystone

以上为localrc文件,用于devstack安装时的配置文件,用git clone一份devstack的源码,将localrc文件copy过去,然后./stack,就可以了。

  1. 创建文件creds:
    exportSERVICE_TOKEN=xxx(3中输入的密码)
    exportOS_TENANT_NAME=admin
    exportOS_USERNAME=admin
    export OS_PASSWORD=xxx
    exportOS_AUTH_URL=http://localhost:5000/v2.0/
    exportSERVICE_ENDPOINT=http://localhost:35357/v2.0
    source creds就可以使用openstack了
  2. 若想更改已安装的组件,再./stack.sh即可

###Pdb调试Havana过程

  1. 修改代码
    在需要调试的地方加入:
    import pdb; pdb.set_trace()(以在nova/compute/api.py:get_all()中加入pdb为例)
  2. 重启服务
    在相应的screen中用ctrl+c终止当前进程,然后按向上的方向键,就会出现启动服务的命令,按enter服务就起来了。
  3. 开始调试:

显示有两个screen
screen –x stack
进入如下界面:

最下一行表示,每一个进程都有一个screen。带*号的表示当前的screen,可以同时按下ctrl+a+8和ctrl+a+2分别前进和后退,来切换不同的screen.

  1. 在0$中输入nova list;切换到4$ n-api:

  2. 开始使用pdb进行调试

  3. 物理机重启后,可使用rejoin-stack.sh启动openstack服务

  4. ctrl+a+shift+”, 可以选择screen , 主要就不需要通过ctrl + a or ctrl + p 来回切换了:)。

###参考资料
1.使用pdb调试openstack
(How to debug openstackusing pdb )

http://blog.csdn.net/hackerain/article/details/8373597

  1. linux screen 命令详解
    http://www.cnblogs.com/mchina/archive/2013/01/30/2880680.html
Jerky Lu wechat
欢迎加入微信公众号